December begins in 2 short hours. As I reflect back on my November blogging challenge, I can't help marveling at what I learned.
I realized that it isn't really a big deal to pull the sewing machine out. I used to not sew very much because it felt like such a chore to get "everything" out. Well, it turns out "everything" is a sewing machine, one fabric bin, and a small sewing box. Not a big deal. Very doable.
Some days were difficult; November was an extremely busy month and I didn't always have the energy to start a project, photograph it, and blog about it...but I did. There is something beautiful and rewarding about discipline. I saw the benefits of forming a habit.
I had the opportunity to challenge myself creatively. I began the month with a list of possibilities, and more ideas sprang up in the midst of projects. I have about 10 leftover ideas that I didn't use! When I started the month I wondered how I'd come up with enough, now I have leftovers!
I have changed how I view fabric and worn-out items. I was driving to work yesterday and realized that my thin, pink knit mittens were getting to be even thinner in some spots. I am not sure how to repair the holes and wondered how much longer they were going to last. I looked at them and began to see the fingers as little ballerina legs. I think when the mittens go I'm going to cut off two of the fingers, put a little stuffing in them, and begin making a small doll. I would have NEVER thought about that before my blogging challenge.
What a fun journey this has been. Thank you for walking with me! Below is a list of my five favorite projects. What were some of your favorites?
Plastic Bag Holder
Shirt Bag
Belt/Headband
Pumpkins
Snowballs

Wednesday, November 30, 2011
Tuesday, November 29, 2011
November 29 - Pumpkins
This project gets major points:
Creative: Yes
Simple: Yes
Kid-Friendly: Yes
Reuses Materials: Yes
Fast: Yes
Cute: YES!
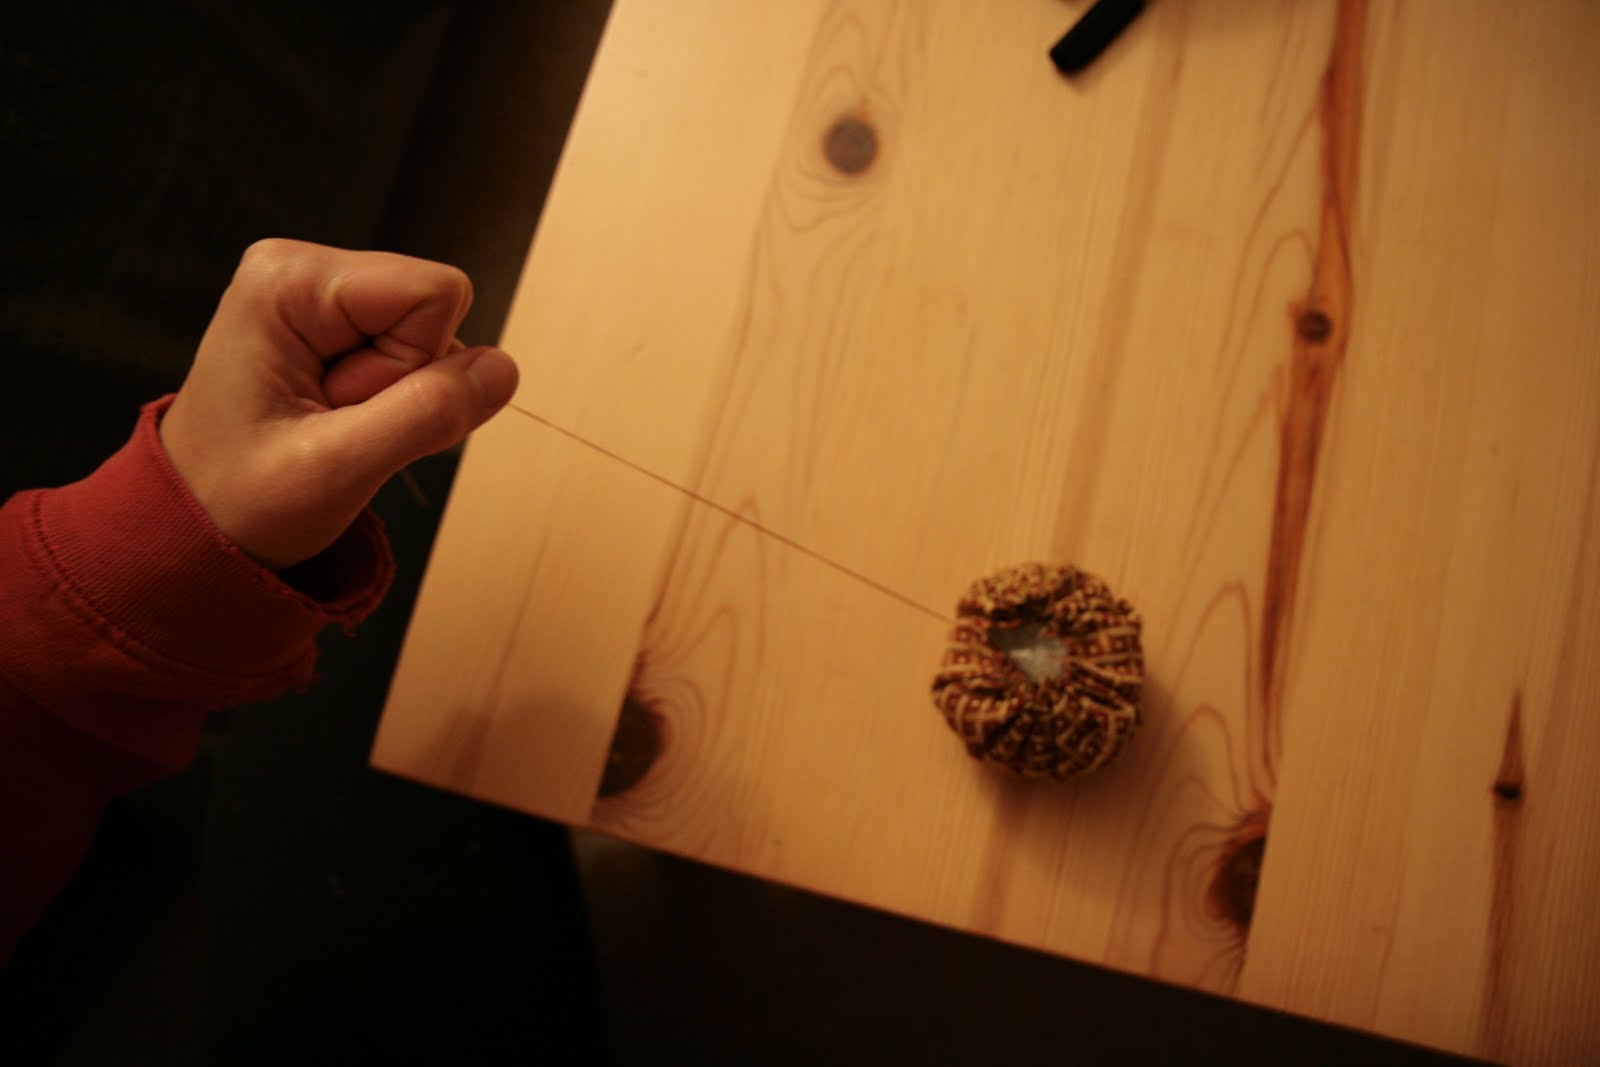
My friend Dani introduced me to this project. She told me how to do it, and last night I gave it a try!
I traced a bowl on a piece of fabric, then cut out the circle.


I stitched loosely across the top of the circle, making wide stitches.

When I finished the stitching, I stuffed some plastic bags inside the circle...

...then pulled my string tight.

After I secured the top, I found a small twig outside to make the stem of the "pumpkin."

I think this project is absolutely adorable. My friend Dani had the cutest fabric for her pumpkins, and she grouped a bunch of them, all different sizes, for a table centerpiece. Thanks for the project idea, Dani! It was so much fun!
Creative: Yes
Simple: Yes
Kid-Friendly: Yes
Reuses Materials: Yes
Fast: Yes
Cute: YES!
My friend Dani introduced me to this project. She told me how to do it, and last night I gave it a try!
I traced a bowl on a piece of fabric, then cut out the circle.

I stitched loosely across the top of the circle, making wide stitches.

When I finished the stitching, I stuffed some plastic bags inside the circle...

...then pulled my string tight.
After I secured the top, I found a small twig outside to make the stem of the "pumpkin."

I think this project is absolutely adorable. My friend Dani had the cutest fabric for her pumpkins, and she grouped a bunch of them, all different sizes, for a table centerpiece. Thanks for the project idea, Dani! It was so much fun!
Monday, November 28, 2011
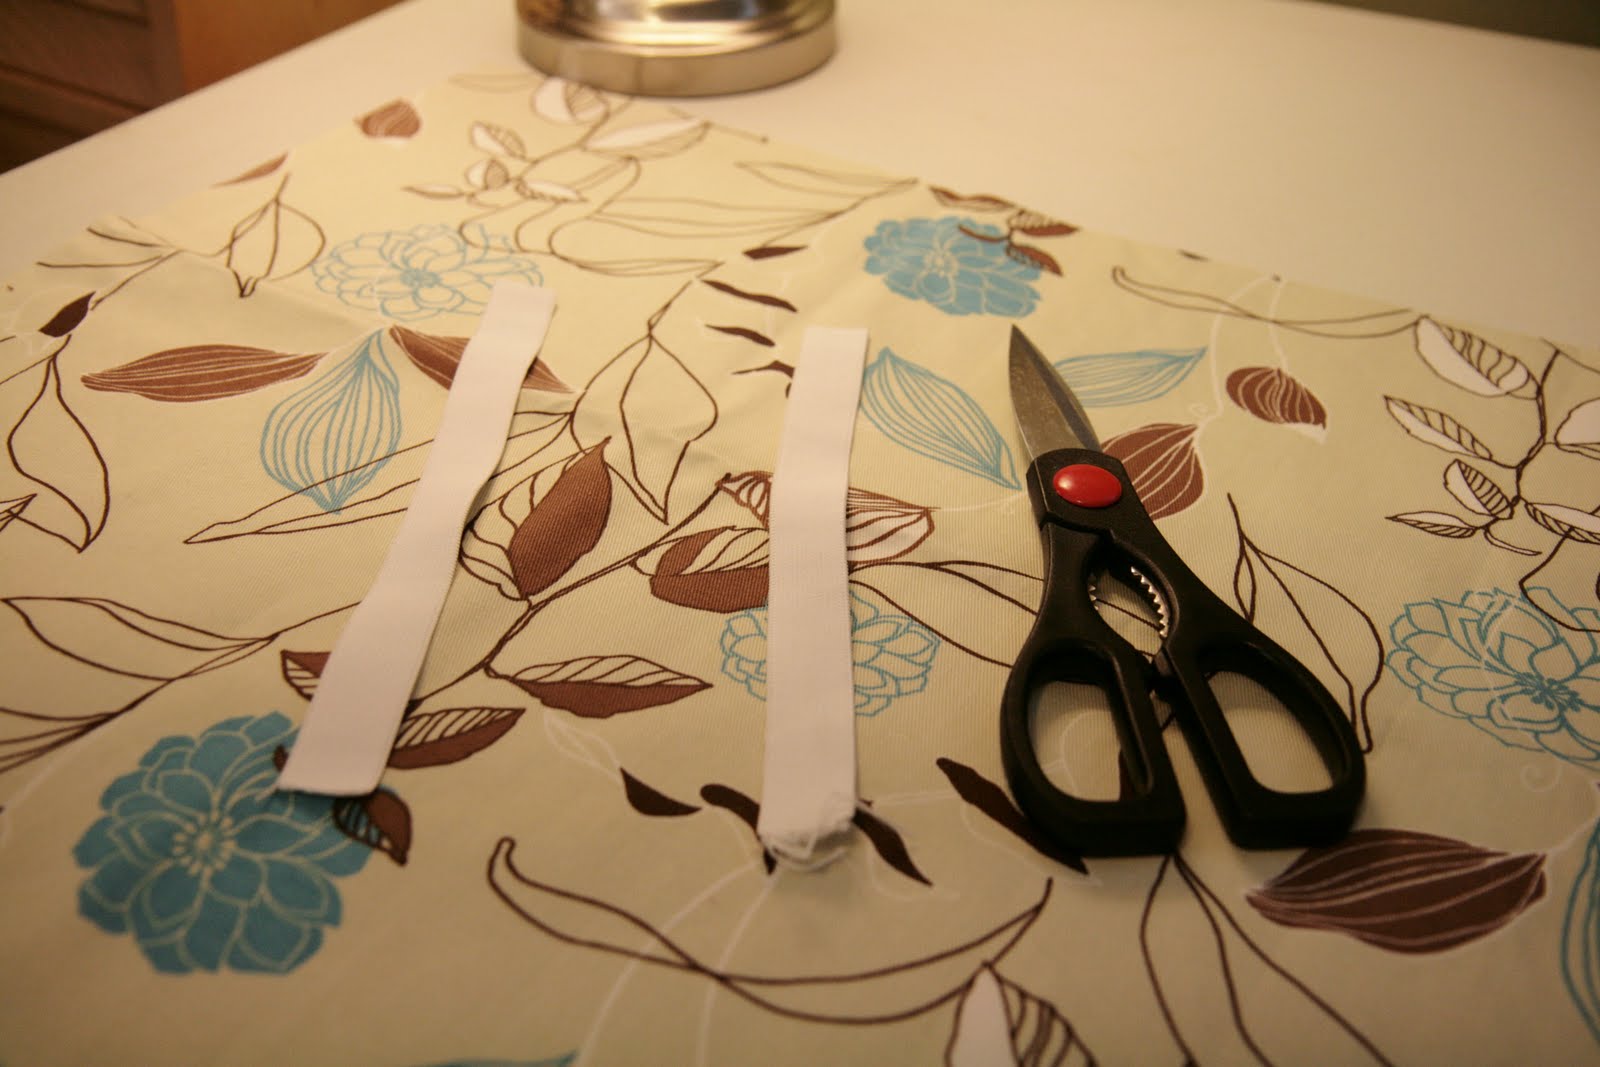
November 28 - Coasters
It was Black Friday and my mom, sister, cousins, aunt and I began our yearly shopping outing by hitting up Michael's craft store. It was here that I realized I needed to make a homemade gift for my coworkers but had not yet come up with any ideas. In the midst of the shopping chaos around me, I uttered the plea, "Anyone have any crafty ideas for a homemade Christmas gift?"
With no more than two seconds hanging in the air, my artsy aunt said, "I do!"
She described to me how to make a simple coaster out of fabric, and she even created a pattern for me out of a piece of paper she found in her purse.
Last night I set out to make my coasters and had a lot of fun!
I began by cutting out six 5" squares of fabric and one 5" square of batting.

After I cut out all the squares, I took two of the fabric squares with their right sides out and sandwiched a square of batting between them.

Then I folded the remaining four squares in half with the right sides out, and layered them around the square, one on top of the other, making a woven pattern. Here you can see the woven pattern when it's all done.

I then went on to sew a seam around the edge. The coolest part of this project was this sewing because I didn't have to leave space to turn my project inside out. I just sewed and sewed all the way around the edge.
Once the sewing was done, I started pulling at the flaps of the weaving until I could turn the project inside out. Here is the back of the finished project.

And here is the front.

I really enjoyed this project and look forward to making three more to complete the set!
Saturday, November 26, 2011
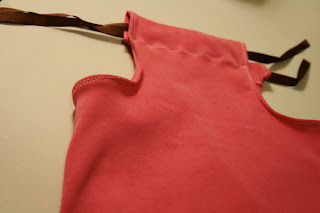
November 26 - Pillowcase Dress
I was looking for a simple dress pattern for a child, and I came across this website. I had an old t-shirt in my scrap bin that I thought would be a pretty pink for a little girl, so I set out to do as they said! It turned out to be as simple as they said and even more fun!
Here are my pictures from my experience. To get the detailed instructions, please follow the link above. They lay out the process so very well!


Here are my pictures from my experience. To get the detailed instructions, please follow the link above. They lay out the process so very well!


Friday, November 25, 2011
November 25 - Bags
Just a friendly reminder to bring your t-shirt bags or other reusable bags if you go out shopping today! I'll be sporting mine!
See you in line!
See you in line!
Thursday, November 24, 2011
November 24 - Thanks
Thank you. Thank you for journeying through life with me, for sharing your stories, and for laughing alongside me as I muddle through life. I appreciate your faithful readership and your faithful friendship. I am blessed. :)
Wednesday, November 23, 2011
November 23 - Cards
A few years ago I had a friend visiting from Germany. She inspired my project for today! I used glue to adhere the fabric to the card. Simple project and it adds a lot of character!


Tuesday, November 22, 2011
November 22 - Plastic Bag Holder
I made one of these a few years ago and use it almost everyday. It holds my plastic bags in a confined space and allows me to pull one out at a time.
I started with a rectangle of leftover fabric.

I cut two strips of elastic, about the length of my scissors. In hindsight, it could have been shorter.

I folded over the edge on the top side of my rectangle, the shorter side. I folded it over almost twice the width of my elastic. Note: Don't sew the elastic on here; the elastic is sitting there just for size reference! I sewed a my little "pocket" at the top where my elastic would go.

After that I needed to put the elastic in the top hem. I used a safety pin to help me maneuver it through the fabric.

When the elastic was through, it was time to attach the elastic to the fabric. I did this by firmly grabbing the elastic and lining it up with the end of my pocket. I then top stitched right over it so it would be held in place. I did the same to the other side of the pocket.

I then repeated the elastic pocket process on the bottom. After that was done, I placed the right sides together and pinned my edge seam.

It's really starting to come together!

I wanted a handle, so I cut a strip of the same fabric, turned the right sides together, sewed, then turned it right side-out.

Before I attached it to the bag, I made sure that it would give me a good loop without a twist in it. That would be the worst!

Here is the finished product, all ready to be loaded up with plastic bags!

I started with a rectangle of leftover fabric.

I cut two strips of elastic, about the length of my scissors. In hindsight, it could have been shorter.
I folded over the edge on the top side of my rectangle, the shorter side. I folded it over almost twice the width of my elastic. Note: Don't sew the elastic on here; the elastic is sitting there just for size reference! I sewed a my little "pocket" at the top where my elastic would go.

After that I needed to put the elastic in the top hem. I used a safety pin to help me maneuver it through the fabric.

When the elastic was through, it was time to attach the elastic to the fabric. I did this by firmly grabbing the elastic and lining it up with the end of my pocket. I then top stitched right over it so it would be held in place. I did the same to the other side of the pocket.

I then repeated the elastic pocket process on the bottom. After that was done, I placed the right sides together and pinned my edge seam.

It's really starting to come together!

I wanted a handle, so I cut a strip of the same fabric, turned the right sides together, sewed, then turned it right side-out.

Before I attached it to the bag, I made sure that it would give me a good loop without a twist in it. That would be the worst!

Here is the finished product, all ready to be loaded up with plastic bags!

Monday, November 21, 2011
November 21 - Shoe Polish Cloths
Immersed in a society that tends to throw away things once they don't look new anymore, it took me awhile to realize that I could use shoe polish on my shoes to make them look like new again.
I cut a few squares of scrap fabric and began my work today. Here's the sad, sorry lot before I started:

Check out these nice scuffs:


Here's the first sign of progress. Look how much shinier the top shoe is than the bottom! This feels good!

And finally the finished product. Now I can feel confident in these shoes again, rather than trying to hide them under my desk at work!

Saturday, November 19, 2011
November 19 - Message Board Makeover
I have had an old cork board in the closet for years, and today I decided to see if I could jazz it up a little bit.

I wanted to pull off the back, take out the cork board, wrap the fabric around the cork board part, then push the cork board back in. However, when I turned the piece over, the back was attached by a billion little staples. Well, maybe it was closer to a million, but it didn't seem worth it to take them out. I opted to put the fabric on top of the cork board instead of around.
I grabbed a piece of scrap fabric and placed it on top of the frame. With a pen, I traced the inside edge.

After that, I cut very carefully. I placed the cut piece inside the frame and was relieved that it fit (almost) perfectly. I opted not to adhere the fabric to the cork board, but rather use pins to hold it in place. This way I can switch it out seasonally or whenever the mood strikes!

Friday, November 18, 2011
November 18 - Belt/Headband
I enjoy dual purpose projects. Today's project can be worn as a belt or a headband.
My scrap bin had some brown and red floral fabric that I thought would make a nice trendy belt for fall.

To begin, I trimmed a section off the bottom. I'm realizing more and more that I like casual projects, so there was no measuring involved, just eye-balling it. It's a belt, nobody will look too closely!
I folded it over with the "right" sides together and sewed along the edge.

A safety pin proved to be very helpful when turning the long, thin tube inside out. After I did that, I ironed it to make it crisp and flat. I cut the ends at an angle, then stuffed them inside and top stitched the very ends.
I can use it as a headband...

Or a belt on the outside of a sweater...

Or a belt on my jeans.

I was by myself when I took these pictures, and you should have seen the outtakes! It's hard to take a picture of yourself by holding a heavy camera at arms' length! However, I hope these photos give you a few inspiring ideas! This was so easy and didn't take much fabric at all. I'll have to keep this project in mind to jazz up some outfits throughout the year!
Thursday, November 17, 2011
November 17 - No Show
Well, no sewing today because it was the release of the Cities 97 Sampler! More on that later, but enjoy the sewing break!
Wednesday, November 16, 2011
November 16 - Banners
I've seen homemade banners popping up and I think I need one.
I set out to do this project with my plethora of red fabric and - you guessed it - some more of that sweatshirt fabric. That has sure come in handy!
I began by cutting triangles out of the red fabric. I didn't finish the edges because I wanted something simple and somewhat rustic.

Online I found some letters I printed, cut out, and used to cut my black sweatshirt fabric. I then sewed the letters onto each triangle by hand. This whole step took about an hour, but I was watching TV also so I don't know how long it would have taken me if I had focused solely on the project!

After that, I folded the top over and made 4 cuts vertically on the fold. Two cuts were placed on the outer edges and two close together in the center.

I grabbed some ribbon from my ribbon jar and strung each flag on.

Without attaching the flags permanently to the banner, I can rearrange them at a later date for other banners. This would be more helpful if I had more letters prepared, but as it stands I can now make another banner that reads "Am" or "Yam" or "Aim" or even "Film." :)
Tuesday, November 15, 2011
November 15 - Little Mittens!
I was given a Christmas basket a few years ago and I found it much more versatile after I pulled out the Christmas lining. That lining was the inspiration for today's project.
Using a cookie cutter, I traced the outline of a mitten onto my fabric.

I cut 2 mittens and put the opposite sides together. I had to trace one of my mittens on the back side of the fabric to make sure my thumbs were pointing in the right direction! After I lined them up correctly, I sewed along the edges, leaving the top of the mitten open. I came across some homemade stuffing (recognize the sweatshirt fabric?) and decided to plump up my mittens!

Here is a finished mitten.

Now, the tricky part was getting them to be the same size. I didn't quite achieve that, but I think they still hold some charm. To increase the cuteness factor, I pulled out my scrap ribbon jar and found some shimmery ribbon to connect the mittens.

I folded the ribbon over at the top seam of the mitten and sewed it on. It was simple. Here is the finished product!

An extension of this project would be to make a garland. My mother in law has some great garland with stars and mittens and maybe even gingerbread too that she puts along the top of her kitchen. Using felt scraps would make the garland project go quicker because you wouldn't have to sew the edges together, you could just leave them unfinished and do some whimsical top stitching for decoration.
Monday, November 14, 2011
November 14 - Shirt Bag
I had the best time making today's project! I heard murmurings from friends about a bag you can make out of a t-shirt, and with a little searching online, I found more details.
This is the shirt I chose from my scrap bin. This shirt has seen its better days. It's stretched out, shrunk in length, and the fabric is fading.

I followed the directions in the linked videos above, and look what I made!


I did one thing differently than the directions showed. I kept the neckline just like it was on the shirt. The directions said to cut down deeper on the neckline to make longer handles, but I liked the reinforced neck. I think it will make a stronger bag in the long run for all of my farmer's market finds!

Subscribe to:
Posts (Atom)